Introduction
Kites can be flown just for the sheer fun of watching them fly, or even as a means of lifting or pulling objects. Some examples of kites that have a practical use include pulling carriages, lifting scientific instruments, providing high platforms for viewing enemy positions during war, and pulling sleds in the Antarctic. Different kite designs are used, depending on the goal. If the goal is to pull a person over the surface of water at high speeds, the design should be a large kite that can be guided by wires or strings to pull in any given direction (see Figure 1). All kites, whatever the design, have certain features in common. They are heavier than air and rely on aerodynamic forces to fly. Kites have a surface that provides the lift necessary to overcome the kite's weight, as well as a solid frame, normally made of wood or plastic. A kite is made as light as possible for good performance, but it must be strong enough to withstand high winds.
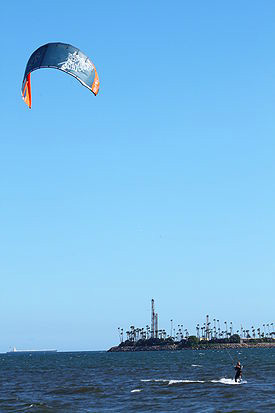
Figure 1. A kite surfer uses the forces created by the wind and the kite to propel himself over the water. (Wikipedia, 2009.)
In this aerodynamics science fair project, you will build a variety of kites and determine which design is best for flying at low wind speeds. An electric fan will provide the wind, or you can perform the experiments outdoors using "real wind". You will measure the wind speed with a handheld anemometer. An anemometer measures wind speed by measuring how fast the wind makes a fan blade turn. As the wind blows, it spins the fan blades and a tiny generator to which they're attached. The generator produces a voltage that is proportional to the speed of the wind, and which is measured by an electronic circuit that gives an instant readout of the wind speed on a digital display. Get those creative juices flowing and let's get started!
Terms and Concepts
- Aerodynamic forces
- Lift
- Anemometer
- Generator
- Voltage
Questions
- Based on your research, what are the parts of a standard diamond kite?
- What are some of the different kinds of anemometers used to measure wind speed?
Bibliography
- National Science Teachers Association. (2006). Kite explorations. Retrieved October 11, 2013 from http://www.nsta.org/publications/news/story.aspx?id=52422
- Gomberg Kites. (n.d.). Kite History: A Simple History of Kiting. Retrieved June 6, 2009, from http://www.gombergkites.com/nkm/hist1.html
Materials and Equipment
- Handheld anemometer; available from online stores, such as www.amazon.com
- Large electric fan, 3-speed; available from online stores, such as www.amazon.com
- Materials for making kites; read through the Experimental Procedure for additional information.
- Tape measure
- Lab notebook
- Masking tape
- Meterstick
- Washable marker
- Helpers (2, in addition to you)
- Framing square or other tool to measure right angles; available at your local hardware store
Experimental Procedure
Important Notes Before You Begin: This is a "do-it-yourself" science fair project, because it's up to you to choose and build the different kinds of kites you wish to test. You may need to modify the procedure below to make it works for your particular kites, fan, etc. You will also design the experimental setup using a fan, which will require some creative problem-solving on your part. As an alternative to using the fan, modify the procedure to test the kites outdoors at various wind speeds.Building Three Types of Kites
- Build three different kinds of kites to compare. For example, you could compare a box kite, a diamond kite, and a sled kite. Visit this NASA website for pictures of different kinds of kites.
- The size and surface area of the kites should be roughly equal.
- A wide variety of kite kits and kite accessories are available at department, hobby, and toy stores. You can even design and build your own kites from scratch.
- Completely assemble each kite.
- Attach 1 meter (m) of flying line to each kite.
Setting Up the Test Area
- Place the fan in a room that has at least 3 m of open space in front of the fan so you can fly the kites. If you don't have that amount of space at home, get permission to use your school gym or another large room at school. The area should be free of drafts.
- Point the fan in the horizontal direction that you will use for the experiments.
- The center of the fan should be 1 m above the ground.
- If you are not able to adjust the height to 1 m, simply use the available height and modify the procedure accordingly.
- Starting at the fan, lay down a 3-m line of masking tape on the floor, perpendicular to the front of the fan.
- Mark the masking tape every 0.5 m, using the washable marker.
Measuring the Wind Speed
- Turn the fan on its lowest setting.
- Use the anemometer to measure the wind speed at different distances form the fan.
- Use meters per second (m/s) as the units for wind speed.
- Measure the wind speed at the 0.5-m marks on the masking tape.
- Use the meterstick to ensure that the anemometer is at the same height for each reading.
- Use the framing square to ensure that the meterstick is at a right angle to the floor.
- Make a data table that shows the distance, in meters, and the corresponding wind speed.
- Graph the distances from the fan on the x-axis and the wind speeds on the y-axis.
- Repeat steps 1–4 of this section for the fan's middle and top speed.
Testing the Kites
- Place the meterstick perpendicular to the floor, 3 m away from the fan.
- The meterstick should be upright, in relation to the floor.
- Have your helper hold the meterstick upright.
- Tape the flying line from the first kite to the top of the meterstick.
- Start with 1 m of flying line, but feel free to adjust to a length of string that works best for you.
- Have another helper hold the kite out toward the fan, so that the flying line is horizontal to the ground, and the kite is facing the fan.
- Turn the fan on its lowest setting.
- Let go of the kite.
- Record whether the kite flies (the string is horizontal or higher) or whether it falls back down. Record in which distance each kite started to fly.
- Add a column to the data table, showing distance from the fan and wind speed.
- Repeat steps 2–6, but this time, at the position 0.5 m closer to the fan.
- Record whether the kite flies (the string is horizontal or higher) or whether it falls back down.
- Repeat steps 2–6, getting progressively closer to the fan, in 0.5-m increments, until the kite flies.
- Record the distance at which the kite first flies. You can identify the wind speed at this distance, based on your previous measurements.
- Repeat steps 2–10 with the fan set at the medium and high speeds.
- Repeat steps 2–11 with the other two kites.
- On the graphs for wind speed vs. distance, add an arrow showing at what distance each kite started to fly.
- Record your observations about which style of kite is best for flying at low wind speeds.
- Once you have worked through the whole procedure with each kite, repeat Measuring the Wind Speed and Testing the Kites at least two more times so that you have three trials. This ensures that your results are accurate and repeatable.
No comments:
Post a Comment